My last entry on the important art of food preservation focuses on lacto-fermentation, which is especially timely in this current moment of extreme cleanliness.
First, let’s define it. Lacto-fermentation harnesses Lactobacillus bacteria’s ability to turn sugars into lactic acid, a natural preservative that inhibits the growth of harmful bacteria. Along with extending shelf life, this process adds interesting flavors, makes plants safer to eat and easier to digest, and helps to boost the population of our microbiome when we ingest these foods.
Foods preserved this way still need to be stored in a cold, dark location and won’t last as long as canned, dried or frozen items. It is the added taste and health benefits that most recommend this method. They are also traditionally often used as condiments, eaten regularly but in small amounts.
History, Including 2020

Cabbage for Sauerkraut
Lacto-fermentation has thousands of years of history all over the globe. Some foods you might recognize using this process are: sauerkraut, kimchi, and yogurt.
In the recent past of 2020, disinfecting and cleanliness became even more of a way of life for people – for good reason (although some are taking it too far – drinking bleach being a good example of that). During a pandemic, extra attention to appropriate anti-germ measures is a smart preventative measure. However, we don’t want to forget all that we’ve learned about the microbiome and the positive role it plays in our health (the happy news about mask wearing is that it prevents disease spread without harming your microbiome).
The truth is, keeping ourselves well populated with microbes helps us stay healthy. This is true for plants as well. In “disease suppressive soils” it’s the presence of soil microbes that allow for plants to stay healthy or fight disease.
The vast majority of microbes do not cause disease and many actively help their hosts thrive. Which makes sense, right? Why would any creature want to harm what it depends on to live? It’s a lesson every species learns or eventually dies trying to.
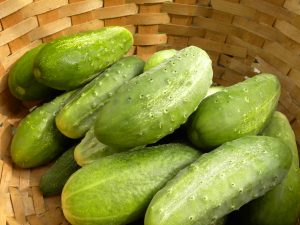
Cucumbers for Pickles
So, especially while we are in the midst of an epidemic of cleaning and have a dangerous new disease in our midst, nourishing our microbiome is especially important.
Personally…
I started incorporating fermented foods into my diet when I was in my 20s and having trouble with my digestive health. I had many tests, went on limiting, exclusionary diets, and even tried pharmaceuticals. All of which made me feel worse. Then, I went to a workshop with Susun Weed who sang the praises of fermented foods to keep our guts healthy. The next day, I threw out the pills and went shopping for yogurt and sauerkraut plus miso and tamari (which are fermented but not lacto-fermented to be precise). I made sure to eat one of those every single day and within a month I felt better than ever.
Continuing to ingest these “friends” on a
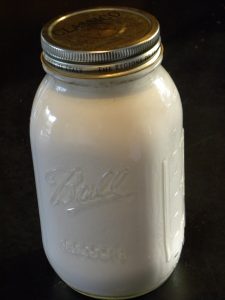
Homemade Yogurt
regular basis has been my practice for the nearly 30 years since then and seems to have served me well. I do also eat a diet that otherwise feeds my microbiome and I avoid factors that harm it as much as possible (there include anti-microbials like: chlorine, food preservatives, cleaning supplies, antibiotics and essential oils).
The Process
Some people get super excited about lacto-fermenting, trying it with all kinds of veggies, and creating new recipes. While very committed to having these foods in my diet, I have been less adventurous simply because I don’t always love the taste. In my repertoire are: yogurt, cultured soft cheese, sauerkraut, cucumber dill pickles and a few experimental jars. Each has a slightly different process to allow the bacteria to get established and do it’s work before microbes that would cause food spoilage get a foothold.
The milk products need a starter culture to be most successful. I buy cultures for the soft cheese but find a spoonful from my current batch of yogurt gets the next one going. I invested in a good thermometer for cheese-making and am careful to heat and cool as the recipe calls
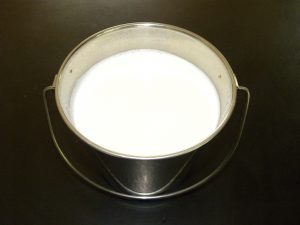
Nigerian Dwarf Goat Milk
for and allow it to remain warm for the appropriate amount of time. Soft cheese is strained, but I don’t need to do that with the yogurt which is thick and creamy because my Nigerian Dwarf goats make such rich milk.
The veggies all come with enough lactobacillus that none need to be added, the environment just needs to be set up to favor them. Usually this is accomplished by adding salt to the water covering the veggies.
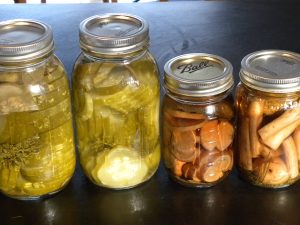
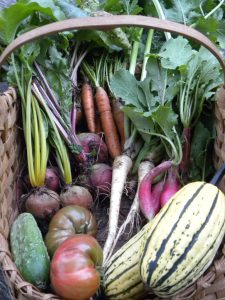
Lacto-fermented Veggies: Cukes, Radishes, Beans
I usually also add dill and garlic for taste and a grape leaf which has tannins that help the veggies stay crisp. Keeping the veggies under the water rather than having them float up is tricky. You can buy glass rounds to weigh them down from the top.
All these dishes can easily be made at home with minimal investment in equipment. I make them in or transfer them to canning jars for storage – in the fridge chevre cheese lasts a week, yogurt 4-6 weeks, a veggie recipe up to a year, although some will get weird sooner.
A big plus of this method is that food safety is not hard to achieve. The environment in one of these preparations will be acidic, filled with bacteria and often salty, all conditions not conducive to Clostridium botulinum, the bacteria that causes botulism. If some other rogue bacteria or yeast does take over your ferment, it will be clear – smell, taste, or texture will not be appealing. Your own senses will warn you, just listen to them.
If you are interested in more deeply exploring and trying lacto-fermentation I refer you to Sandor Ellis Katz’s books, online writings and classes.
Wrapping Up My Food Preservation Series
I’ve spent more than a year discussing how to preserve food with you all as a way to continue to eat locally in the north year-round. These are critical skills that have been developed over human history and that we can now dust off and use again. It’s a great way to build community resilience, so let’s keep the practices alive!
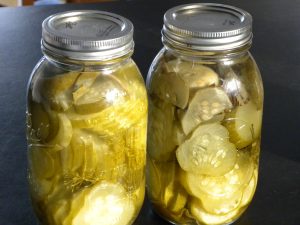
Lacto-fermented Pickles


 I will continue to try