Tag Archives: vegetable

Perennial Edible Vegetables

Rhubarb in April

For those of us in temperate areas, eating local means learning how to extend harvests into the less productive seasons. Last year I wrote about the many food preservation methods that we can use. Another strategy is to find ways to get your plants to produce earlier in the spring and later in the fall. Perennial edible vegetables are one way to get an earlier harvest. They have a lot of other benefits, too.

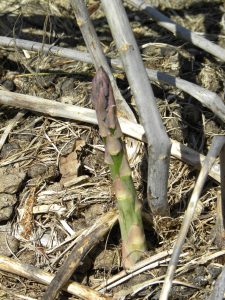
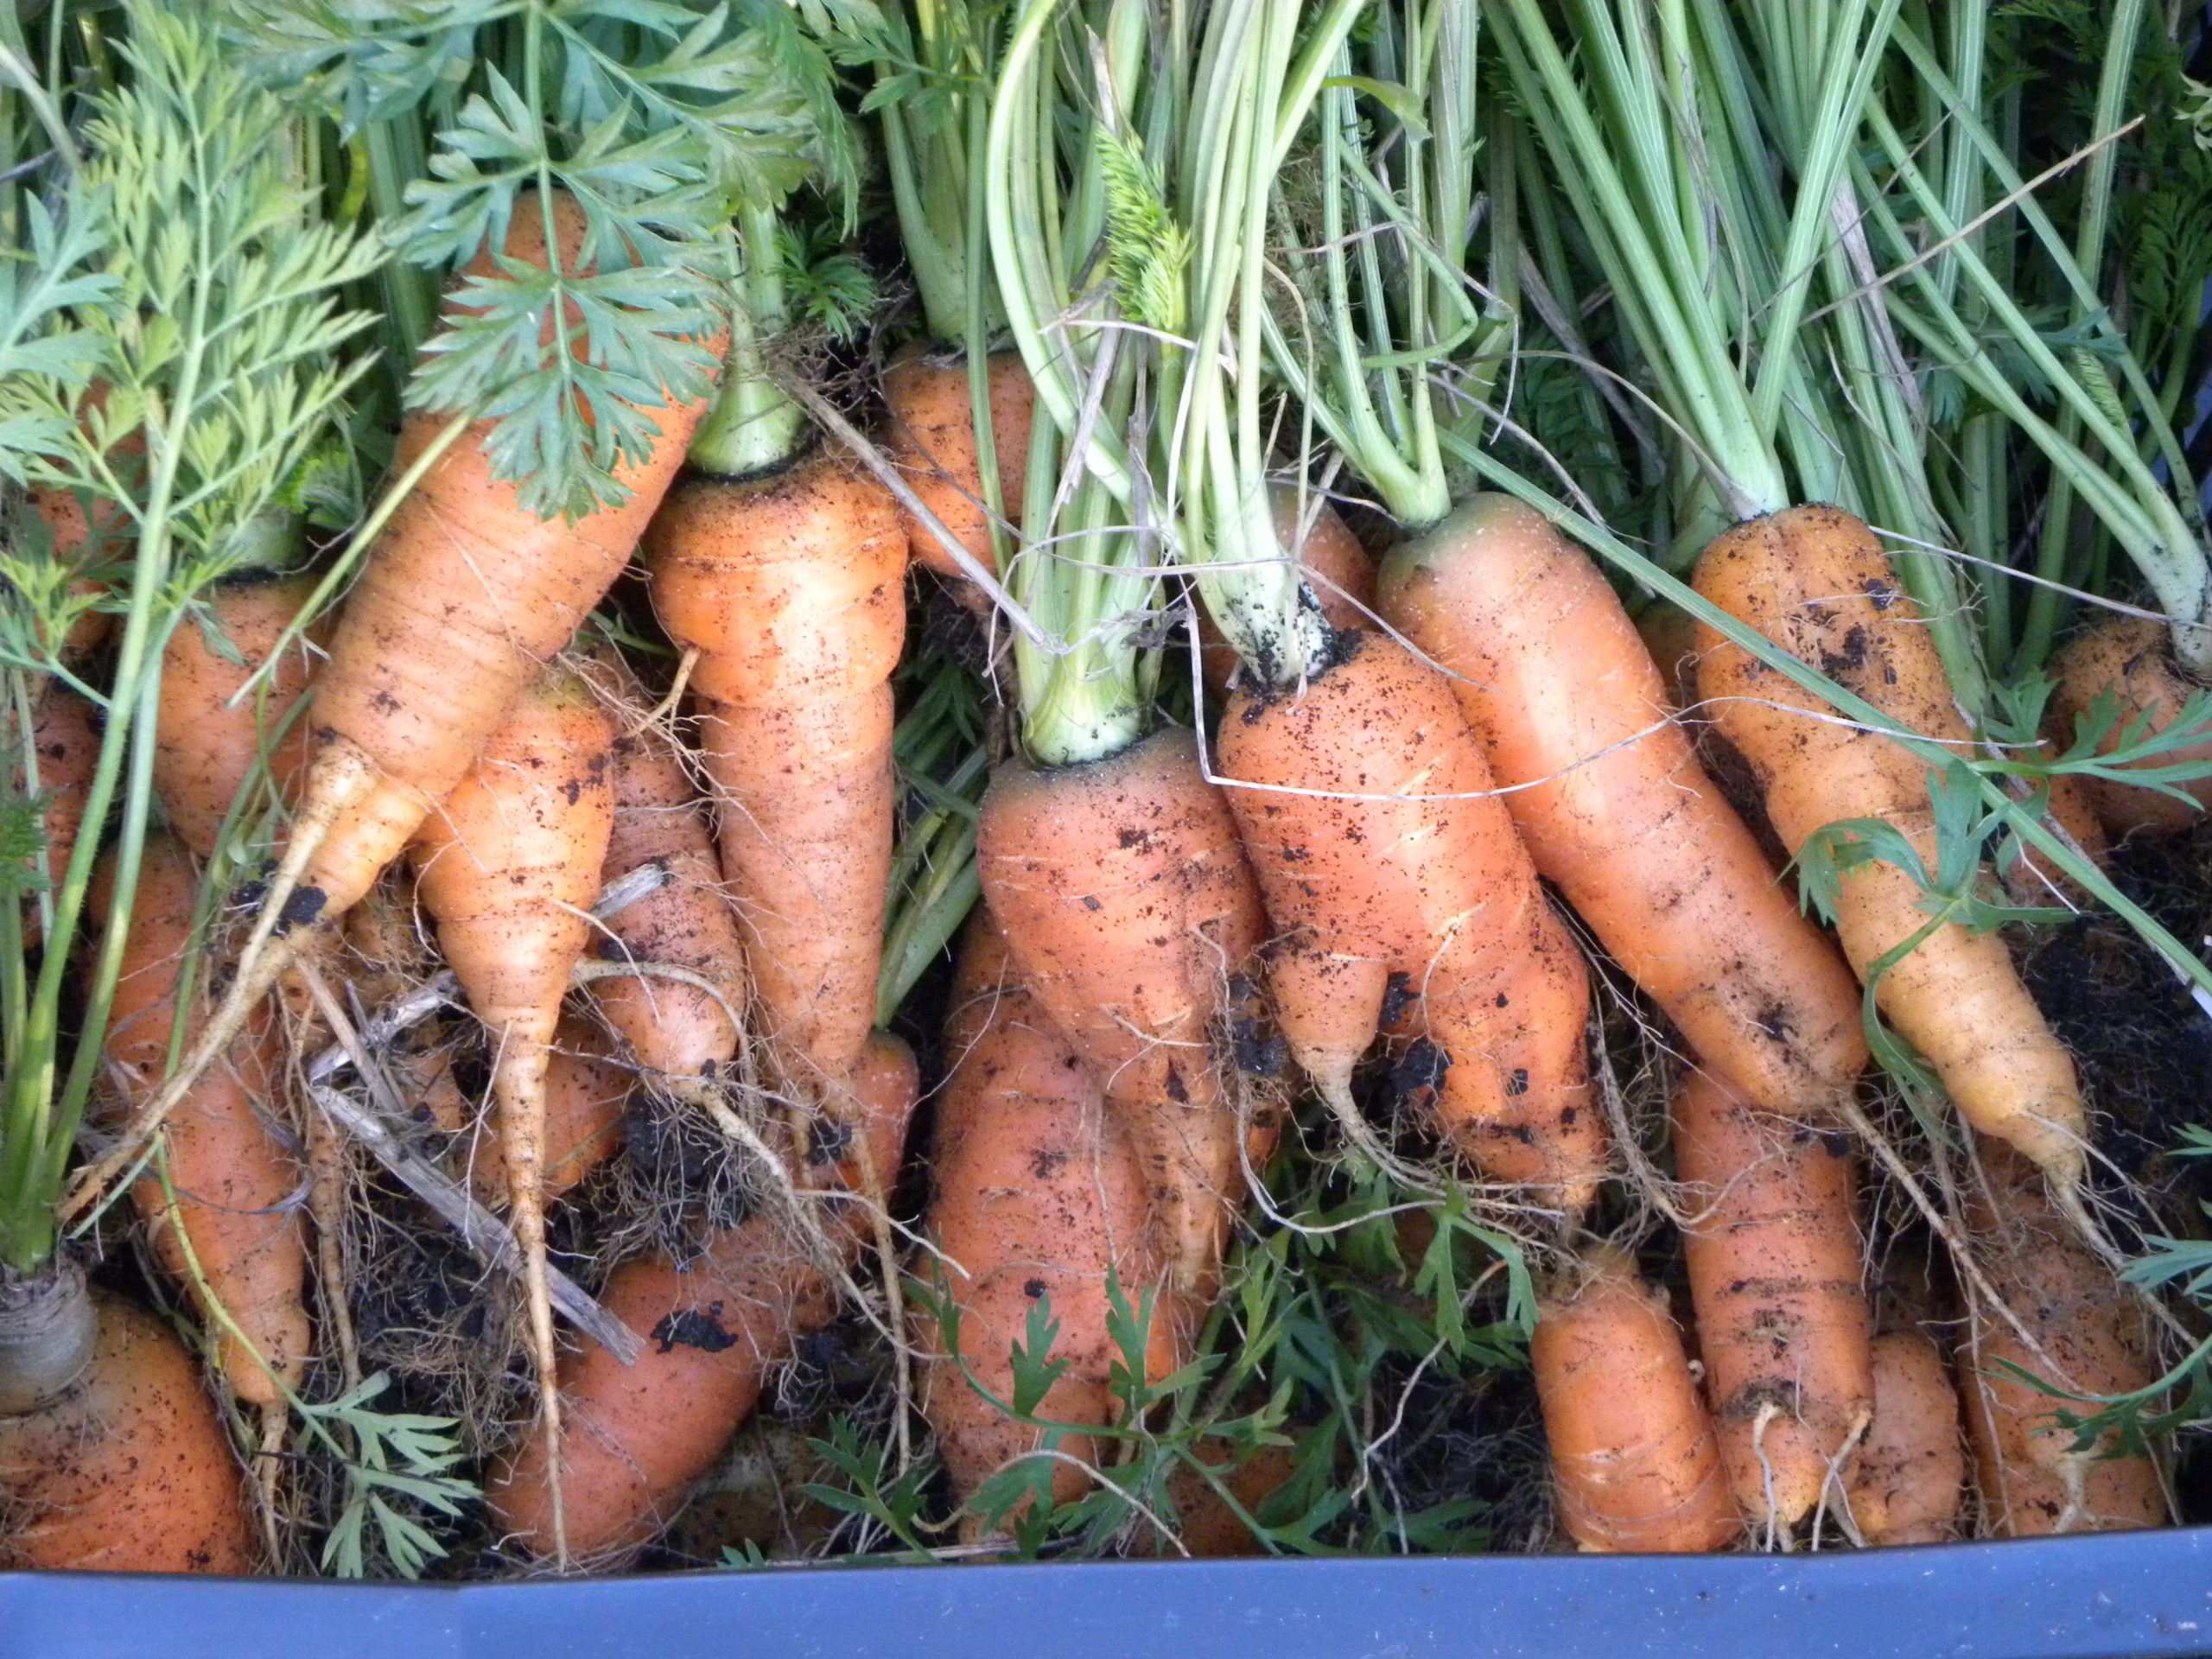
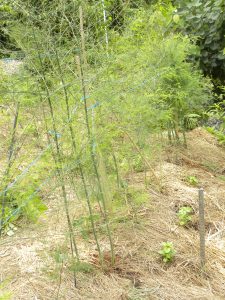
Asparagus Emerging in April

Most of the vegetables that we eat are annual plants or biennials that we harvest in their first year (most root crops are biennials, like carrots and beets). These need to be replanted every year, can be delicate and are not great at building soil. Perennials on the other hand, regrow all by themselves after getting established, can take much tougher conditions and offer year-round living space and food to many in the soil food web. We also noticed in this year’s spring drought, they did not need nearly as much watering as our tiny starts did. As our weather patterns continue to shift, more resilient plants are critical to invest in.

Because perennials can develop large root systems that feed them year after year, they have the chance to grow much earlier in spring. While I’m still babying many of my seedlings indoors and have only just started planting seeds, some perennial veggies are ready to be eaten!

There are resources and people who have extensive knowledge of many plants in this category. I especially recommend Stephen Barstow and Aaron Parker’s work if you want to delve deeply. I’ll just tell you about the handful of veggies that we have been working with here at Living Land.

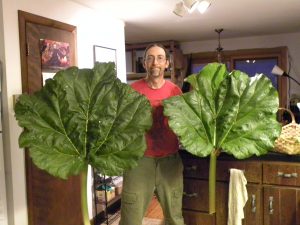
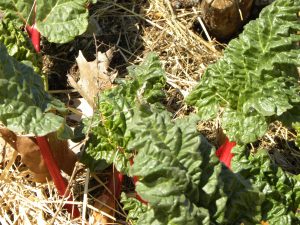
Rhubarb grows well for us!

Some perennial edible veggies are already well-known and well-grown, in particular asparagus (Asparagus officinalis) and rhubarb (Rheum rhabarbarum). Asparagus needs a few years to really get established, then should produce for a minimum of 20 years (most sources say 10-20 years, but at farms where I worked we often were harvesting from beds at least double that). We’ve had great luck with rhubarb, with the plants usually being vigorous enough by their second year for us to begin harvesting from them. You probably already have recipes or ideas of how to use both of these, which helps greatly when all your work pays off and you have the food in your kitchen ready to use! We also tried something new this year – interplanting asparagus with strawberries. We read that they could be good companions, since they use different above ground space and root zones.

Dandelions – Gorgeous!

Next let me mention two very early producers which most people think of as an herb, a medicine or, sadly, a problematic weed: stinging nettles (Urtica dioica) and dandelions (Taraxacum officinale). They are super easy to grow and bring other benefits, too. Both are exceptional soil builders and dandelions are important pollinator plants. The early leaves of both of these plants are extremely nutritious. Dandelion leaves can be used in salads, braised, or added to soups. Nettles do need to be cooked for at least a few minutes to deactivate their sting, so are great as greens in veggie dishes. I also dry them for making herbal infusions.

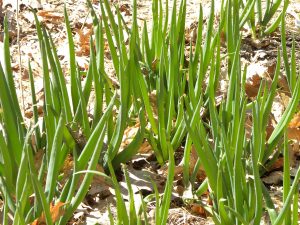
Egyptian Onions in April

Egyptian walking onions (Allium proliferum) also appear early in the season, generally after the stored winter onions and overwintered leeks are running out. Perfect timing! There are actually various types of perennial onions to choose from.
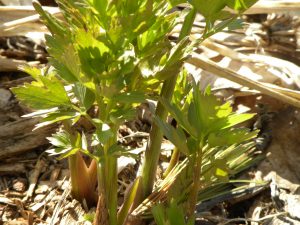
Lovage in April

Lovage (Levisticum officinale) can also be considered an herb. This is essentially celery that comes back year after year. I don’t like celery or lovage, but Steve does and I have found many recipes out there to try if you are a fan.

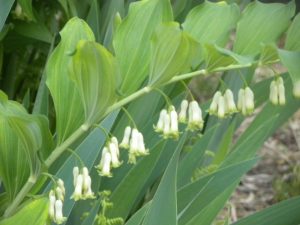
True Solomon’s Seal has flowers all along the stem

Solomon’s Seal (Polygonatum biflorum) and hosta (Hosta spp.) you may know as ornamentals, but you can also eat their early shoots just like asparagus. Since they have been selected for how they look, their taste will vary from plant to plant. None will make you sick, but some will be more palatable than others. I like these in braised veggie dishes, soups and quiches. You will want to pick them when they are short, before they leaf out.

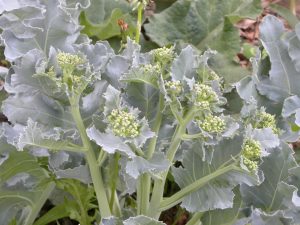
Sea Kale Florets in May

We have been working on getting Sea Kale (Crambe maritima) established here and seem to finally be succeeding. All parts of the plant are edible, especially the leaves and flower buds (like broccoli). This is another to cook up with various veggies for fresh spring dishes.

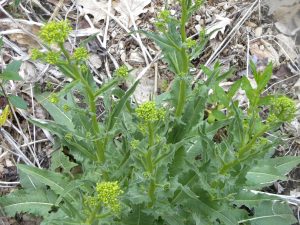
Turkish Rocket Florets in May

Our Turkish Rocket (Bunias orientalis) plant made it through one winter and produced some nice florets for Steve’s omelets. Turkish Rocket is especially known to be drought-tolerant so we are excited to have a nice bed set aside for it to fill in.

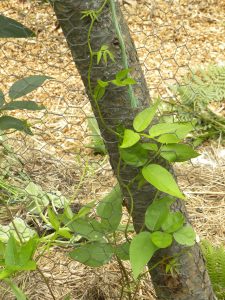
Ground Nuts Climbing

This year we started a bed of Ground Nuts (Apios americana) complete with a serious trellis for climbing, and Hablizia (Hablizia tamnoides) with space to climb as well. The ground nut tubers will be ready to start harvesting in two years. Hablizia’s spinach like leaves we can start eating as soon as the plant seems established enough. We look forward to trying them both.

There are many annual plants I don’t expect to ever give up, however for the sake of our soil and to have a resilient food supply, expanding our perennial food plantings makes a lot of sense. We plan to add more every year. How about you?

Asparagus interplanted with strawberries and basil

7 Comments

Filed under Gardens, Soil, Uncategorized, Weather

Food Preservation: Lacto-fermenting

My last entry on the important art of food preservation focuses on lacto-fermentation, which is especially timely in this current moment of extreme cleanliness.

First, let’s define it. Lacto-fermentation harnesses Lactobacillus bacteria’s ability to turn sugars into lactic acid, a natural preservative that inhibits the growth of harmful bacteria. Along with extending shelf life, this process adds interesting flavors, makes plants safer to eat and easier to digest, and helps to boost the population of our microbiome when we ingest these foods.

Foods preserved this way still need to be stored in a cold, dark location and won’t last as long as canned, dried or frozen items.  It is the added taste and health benefits that most recommend this method. They are also traditionally often used as condiments, eaten regularly but in small amounts.

History, Including 2020

Cabbage for Sauerkraut

Lacto-fermentation has thousands of years of history all over the globe. Some foods you might recognize using this process are: sauerkraut, kimchi, and yogurt.

In the recent past of 2020, disinfecting and cleanliness became even more of a way of life for people – for good reason (although some are taking it too far – drinking bleach being a good example of that). During a pandemic, extra attention to appropriate anti-germ measures is a smart preventative measure. However, we don’t want to forget all that we’ve learned about the microbiome and the positive role it plays in our health (the happy news about mask wearing is that it prevents disease spread without harming your microbiome).

The truth is, keeping ourselves well populated with microbes helps us stay healthy. This is true for plants as well. In disease suppressive soilsit’s the presence of soil microbes that allow for plants to stay healthy or fight disease.

The vast majority of microbes do not cause disease and many actively help their hosts thrive. Which makes sense, right? Why would any creature want to harm what it depends on to live? It’s a lesson every species learns or eventually dies trying to.

Cucumbers for Pickles

So, especially while we are in the midst of an epidemic of cleaning and have a dangerous new disease in our midst, nourishing our microbiome is especially important.


Personally…

I started incorporating fermented foods into my diet when I was in my 20s and having trouble with my digestive health. I had many tests, went on limiting, exclusionary diets, and even tried pharmaceuticals. All of which made me feel worse. Then, I went to a workshop with Susun Weed who sang the praises of fermented foods to keep our guts healthy. The next day, I threw out the pills and went shopping for yogurt and sauerkraut plus miso and tamari (which are fermented but not lacto-fermented to be precise). I made sure to eat one of those every single day and within a month I felt better than ever

Continuing to ingest these “friends” on a

Homemade Yogurt

regular basis has been my practice for the nearly 30 years since then and seems to have served me well.  I do also eat a diet that otherwise feeds my microbiome and I avoid factors that harm it as much as possible (there include anti-microbials like: chlorine, food preservatives, cleaning supplies, antibiotics and essential oils).

The Process

Some people get super excited about lacto-fermenting, trying it with all kinds of veggies, and creating new recipes. While very committed to having these foods in my diet, I have been less adventurous simply because I don’t always love the taste. In my repertoire are: yogurt, cultured soft cheese, sauerkraut, cucumber dill pickles and a few experimental jars. Each has a slightly different process to allow the bacteria to get established and do it’s work before microbes that would cause food spoilage get a foothold.

The milk products need a starter culture to be most successful. I buy cultures for the soft cheese but find a spoonful from my current batch of yogurt gets the next one going. I invested in a good thermometer for cheese-making and am careful to heat and cool as the recipe calls

Nigerian Dwarf Goat Milk

for and allow it to remain warm for the appropriate amount of time. Soft cheese is strained, but I don’t need to do that with the yogurt which is thick and creamy because my Nigerian Dwarf goats make such rich milk.


The veggies all come with enough lactobacillus that none need to be added, the environment just needs to be set up to favor them. Usually this is accomplished by adding salt to the water covering the veggies. 

Lacto-fermented Veggies: Cukes, Radishes, Beans

I usually also add dill and garlic for taste and a grape leaf which has tannins that help the veggies stay crisp. Keeping the veggies under the water rather than having them float up is tricky. You can buy glass rounds to weigh them down from the top.


All these dishes can easily be made at home with minimal investment in equipment. I make them in or transfer them to canning jars for storage – in the fridge chevre cheese lasts a week, yogurt 4-6 weeks, a veggie recipe up to a year, although some will get weird sooner.

A big plus of this method is that food safety is not hard to achieve. The environment in one of these preparations will be acidic, filled with bacteria and often salty, all conditions not conducive to Clostridium botulinum, the bacteria that causes botulism. If some other rogue bacteria or yeast does take over your ferment, it will be clear – smell, taste, or texture will not be appealing. Your own senses will warn you, just listen to them.

If you are interested in more deeply exploring and trying lacto-fermentation I refer you to Sandor Ellis Katz’s books, online writings and classes.

Wrapping Up My Food Preservation Series

I’ve spent more than a year discussing how to preserve food with you all as a way to continue to eat locally in the north year-round. These are critical skills that have been developed over human history and that we can now dust off and use again. It’s a great way to build community resilience, so let’s keep the practices alive!

Lacto-fermented Pickles

Leave a Comment

Filed under Food Preservation, Gardens, Goats, Uncategorized, Weather

Food Preservation: Cold Storage

Carrot Harvest

The bulk of the food we store for winter we do so in cold storage, either in a cool room in the house or in our root cellar. Most of the work filling those spaces happens late in the season, so it is one of my last entries on food preservation methods despite how important it is to us.

The beauty of this ancient technique is that there is no electrical energy needed. No boiling water, no heating element, no freezer. Instead it uses the stable temperature of the ground and the colder times of year to extend the lives of veggies and fruits that already tend towards longevity after picking. For us, these are: garlic, potatoes, winter squash, pears, apples and roots (carrots, parsnips, beets).

What it does require from us, is choosing varieties that are known to keep well, appropriate spaces, and some care in how we handle and pack the produce. A cool room or closet in a house works great for some items. Others need a lower temp along with a moist environment like a root cellar provides. Basement root cellars can be made reasonably easily and cheaply and are right there in your house. We do not have a basement, so we had to do the slower, harder work of creating an outdoor root cellar.

In-Home Cool/Cold Storage

First, let me tell you about the foods we are able to preserve in our house. Because building our root cellar took years, even foods that I thought needed that real root cellar I went ahead and tried in the house. A number of these worked better than I expected. Plus, I (and the cats) can protect foods inside better from rodents – an important bonus!

Garlic – Garlic is harvested in late July, then cured on our breezy porch until the leaves all die. I trim them up, weigh and label them, put them in paper bags and move them downstairs to a dark, somewhat cooler closet. I grow four different varieties of garlic and we eat them in the order of least long-lasting to most: Red Russian, Music, Phillips and NY Extra Hardy. They do not seem to be bothered by sitting in our non-air conditioned house through some heat in the late summer and fall, and the drier environment makes the house a better choice than the root cellar. With this system, we have garlic all the way into the next summer. By the time the NY Extra Hardy is starting to dry up or have brown spots, we are harvesting the next crop. We save our own garlic seed, too, so now are totally garlic independent! By the way, for a year’s supply of garlic to eat and seed garlic, I grow 120 heads.

Winter Squash, Stored Indoors

Winter Squash – Over the years, we have settled on some favorite kinds of winter squash out of the wide number of choices: Butternut, Delicata, Long Pie, Seminole and Long Island cheese. Lots of nice, sweet flesh, a reasonable size and long storage are three criteria I have used. Again, some last longer than others, with the Seminole being the best keepers – I have 5 here from Fall 2019, an experiment in seeing how long they will last. We grow a lot of winter squash because we also feed it to our animals over the winter months, especially to keep goats on the milking stand. This year our total was 749.5#. Since they like warmer and drier conditions than our root cellar, we have a storage room set up that they dominate this time of year. Harvest generally runs from September through October, or until the first frost. Then we “cure” them in a hot, humid spot (for us, a greenhouse) for 2 weeks to harden their skin. After curing, they come in to the cooler set up we have for them. I can keep an eye on them, pulling any showing signs of spoilage first.

Potatoes

I was not a huge fan of potatoes until we started growing them ourselves and thus could choose from an amazing array of colors and textures! Purple Magic Molly, red Amarosa, red/yellow Pinto, Adirondack Reds and Blues, to name a very few of the myriad of options available as seed potatoes. Potatoes aren’t simple to grow, there are a variety of challenges. They are loved by other critters, especially potato beetles and voles, and they are very sensitive to drought or even inconsistent rains. They need to be hilled, then dug/forked up, which takes more human strength and soil disturbance than any other crop I grow. But, in a good year, it is worth it! We’ve had yields as high as 20 to 1 (for every pound I planted we harvested 20 pounds). We dig them a couple of weeks after the green tops have died, then I sort them, unwashed, into “will store” and “use soon” piles. The ones in good condition I lay out in trays on a shelf and floor of a dark downstairs closet then cover them with paper bags. I have read conflicting advice on how to cure potatoes (so, I don’t really), perfect storage temperature and humidity. So, I just keep trying slightly different systems and seeing what happens. I estimate that they are generally around 55F, which is a bit too warm, and 60% humidity, which seems about right. Laying them out on trays takes up a lot of room, but really helps me keep an eye and pull any that are rotting and use the ones threatening to sprout first.

Fruit

Pome fruits – especially pears and apples – can last for months in cold storage.  In fact, most pears should ripen off the trees, but need the time inside to reach maturity.

Old, Untended Apple Tree Between Parking Lot and Road

I have not planted apples here, since I don’t like them enough to deal with all the diseases and pests they have. We have put in 8 pear trees but they are not old enough to bear yet. However, we have great success gleaning both these crops. The apples we bring home from untended trees in public places are completely organic, but often are low quality in terms of taste and pest damage. Our goats, however, have yet to reject a single one! And there’s always enough good fruit for us to make

Bella Guarding Apples

a batch of applesauce and many apple pies. Usually I can pick up drops from August until November and we’ll all be eating them into January. They are in buckets and trays in our cool lower floor which is closer to 50F rather than the ideal temps of 36F otherwise we could keep them even longer.

Pears are intended for us humans, although we share them with the goats. Laying them out in trays around 50F gives me about a month when they can ripen. During that time we eat them, make nice pear dishes (here’s a great one we found, just substituted in wheat flour and maple syrup), and do at least one round of canning and/or dehydrating to stretch the season. November is a time when I can heat canning water on the wood stove and am glad for the extra heat and moisture from either method.

Root Cellar

Our Root Cellar

When we bought a house without a true cellar (obviously we have a lower floor, but it is not situated under ground level), we knew we would have to put in extra work to achieve this sort of storage. There are many clever options for burying trash cans and coolers and even vehicles.

Inside the Root Cellar

But I wanted it to be convenient enough that we can actually use it, even as we get older. Having to dig snow and ice off and unbury it for access didn’t appeal to me. So, we hired a neighbor and his excavator to dig into the slope next to our house. Then, over the next few years, we took rocks from all over our property plus some concrete blocks we found and constructed the walls. A very robust roof was made, covered with a pool lining we found at the dump, and heaped over with soil. Perfecting the drainage, air flow and temperature regulation will continue, but it is working! It has never frozen, but we have some trouble keeping it cold enough. Again, we’ll keep learning about it as we live with it over time.

Packing Carrots for Storage

What we use it for is simple: roots! Carrots, beets, and parsnips so far. I make sure to pick varieties known for storage prowess, and need to time my planting so they are ready at the correct moment. Having carrots and beets ready to store in August isn’t helpful – the cellar isn’t cold enough and if I leave them in the ground, they might get too big and tough or be eaten up by voles.

I will continue to try other kinds of roots now that we have it, such as parsley root, winter radishes, skirret, and salsify.

I pack the roots in damp clean sand for storage. You don’t want treated, salted sand offered free at your dump. Maybe you have sand around your home you can dig up, or you can buy clean sand from a gravel pit. If you end up with rotted veggies, you’ll need to dig out and no longer use the material around those, but we are otherwise reusing sand. We let it dry out in the sun over the summer to keep microorganisms in check.

They biggest challenge is protecting against rodents. Currently, I am using old coolers that I picked up from the dump or Good Will which have some extra insulation to moderate temperature changes and I hope are too tough for critters to gnaw through.

With this system, we were eating our own roots up until May last time around. This year we had more trouble with our crop (the drought hindered germination and growth, and we had a late season vole problem) so likely will have eaten most before that late in Spring 2021.

I am pleased to be having so much success and continuing to develop our capacity for cold storage, a low-electricity, time-honored way of greatly extending our harvests into the least productive time of year.

2 Comments

Filed under Food Preservation, Gardens, Uncategorized, Weather